Sunday, January 31, 2010

Best friends.

Seriously? Today's the last day of January? Wow. I must be getting old because I talk about things like time flying, and the weather - old people stuff *wink*

Anywho - just a busy little BFF kinda card that one of the kids can take to a birthday party for a classmate sometime. Patterned papers & chipboard from Sassafras, Jenni Bowlin bingo card, stamp from...um...think that Stampology/Archiver's brand, ribbon by Papertrey Ink and some fantastic Autumn Hay glimmer cardstock from Paper Temptress.

BestFriends_11_02_09

Have a great Sunday!

Saturday, January 30, 2010

WISH.

Happy weekend!

I love today's card....just love it! The patterned paper I've got on here is actually from Papertrey Ink's Holiday Cheer paper pack but I don't think it makes the card look Christmassy, do you? Those big WISH letters are by Colorbok and I got them at Target for $1. The rest is just some scraps of a Jenni Bowlin bingo card, American Crafts dimensional sticker, and a Zva star.

WISH_11_04_09

Hope your Saturday is fantastic!

Friday, January 29, 2010

Love you forever.

Happy Friday, Girls!
January is just tick-tick-ticking away and it's totally crunch time for Valentine's Day! So let's get to it.

Today I've got a sweet little card I made for one of my kiddies - and a lil' step-by-step because I think that kinda stuff is neat-o to see.
So I started with some more of this fun Sweet Cheri paper by Imaginisce and just punched some hearts out of it.

LoveYouForever15_01_19_10

There are so many colors in this paper, dark too, so I decided to go with a light base of Vintage Cream from Papertrey Ink. And then placed my hearts here and there to see if something tickled my fancy.

LoveYouForever14_01_19_10

LoveYouForever13_01_19_10

I opted for the hearts on the upper right because I didn't know how I would incorporate ribbon with the hearts going down the front of the card. And I needs me some ribbon on my card, y'all!

LoveYouForever12_01_19_10

Then I tied my pretty Hibiscus Burst bow. Some people have asked me about how I get my bows to look the way they do - I have no secret. I tie a bow like tying my shoes. The only thing I can say is that some flimsier ribbons - though very pretty - are sometimes harder to get into the perfect bow so you have to play with them a lot...which is why I don't use them too often because I don't have that kind of patience *giggles*

LoveYouForever11_01_19_10

LoveYouForever10_01_19_10

So here's the part where I get stuck. And it's my own issue because of the way I create a card. But I sort of fancy a little challenge now and then so here we go: so now my bow is on, my hearts are on - what about a sentiment? That's usually the last thing I decide on, what stamp and where to put it (kind of important details) - LOL I found the perfect spot, but I had to put the stamp at the top of the block to get it to stamp without the block knocking in to the ribbon and messing me up.

LoveYouForever9_01_19_10

LoveYouForever8_01_19_10

Now to embellish - with buttons, of course. And I thought I would show you my shameful way of storing buttons. I have this rolling cart with drawers and one of them is full of all my Papertrey button bags.

LoveYouForever7_01_19_10

I pulled out the colors that matched the colors in my patterned paper: Dark Chocolate, Scarlet Jewel, Orange Zest, Raspberry Fizz and Sweet Blush. And you'll notice I have a little Maya Road pin there. That's because I saw this great button pin that Anabelle O'Malley made and I knew I had to try it.

LoveYouForever6_01_19_10

I placed my buttons in the color order I wanted, and then put a thin Glue Dot on the top of each (except the top one) and poked the needle down through all of them in a nice pretty stack.

LoveYouForever5_01_19_10

LoveYouForever4_01_19_10

I also wrapped a Glue Dot around the bottom of my pin for some extra stay in the ribbon. I actually cut some of the bottom of the pin off because it was too long and I didn't want it hanging out too far down there with the sentiment.

LoveYouForever3_01_19_10

And then I put a little bit of Tombow Mono Multi behind the little button pin stack so that it would stay there and not flip flop around. I put pressure on it with my heavy wire cutter.

LoveYouForever2_01_19_10

I added a little Dew Drop to the bow in one of my hearts just to have a lil' dimension over on that side of the card - and there ya' have it!

LoveYouForever1_01_19_10

TGIF!

Thursday, January 28, 2010

I {heart} you - hubby.

Good Morning, Dolls!

Alright, so here's the thing. Remember all that I was saying the other day about Zva bling? Well I have decided that I am done with it. I don't want to bash it, but I've used it enough - on cards you have seen and some you haven't (yet) - but I'm done. Thing is - my husband bought me some for Christmas - LOL I did ask for it - but that was before I knew what I know now.

So anywho - I made him this card for Valentine's Day. I normally wouldn't have bling like this on a card for a male, however, I felt like I should use it since he gave it to me.

IHeartYouHubby_01_23_10

The more I got to looking at this card, the more I hated it. The bling just was not working for me. So - I tore it off. LOL - told you it doesn't stick well! So I cut out some words from my American Crafts coordinating patterned paper to match the background, added a Zva arrow (much better luck but still not over the moon for this product) and called it good. And you see the line that says "I heart you hubby" - that's the title of that paper and it's right off the edge, so I used it and made this a no-stamping card - heh.

IHeartYouHubbyremake12710

Alright - now I've got to get rid of my Zva bling before I keep running my mouth about it. Does anyone want it? I've got a big black swirl pack, a 1/2 used dark fuschia big swirl pack, a small silver swirl pack and a 1/2 used small silver swirl pack - - and 2 BasicGrey Bling It Ons. Start your comment with I WANT IT if you want in on my little cheap-o blog candy *giggles*

Have a super day!

Wednesday, January 27, 2010

Valentine treats - Simply Renee.

Today I'm sharing the post that I have up over at the Simply Renee blog. If you don't know who Simply Renee is, that's the company who makes the Clip It Up! and they've hired me as one of their new designers. They are really nice people too. Miss Renee herself called me on the phone - she's got the sweetest voice and, she told me that I'm adorable *blush* So anywho, I'll be doing some things for them - including a post next month with my little craft area reorg since getting my new Clip It Up! piece.

But for today, I'm sharing a fun lil' Valentine project I made for my son's second-grade class. I wanted to make something with these cute little acetate pillowboxes that I picked up at Embellish It Online.

I started by cutting some fun Pink Paislee paper in to 2.5" strips. And then just for a little something extra (like a backache after doing 25 of these!), I added some stitching. I chose this wavy pattern instead of a straight-stitch or a a zig-zag because of the rounded pattern on the paper.

Feb03_9

Feb03_8

I then cut a busier piece of Pink Paislee paper in to 1.5" strips and adhered them to the bottom of my stitched heart piece.

Feb03_7

Then I filled my pillowboxes: a little heart notepad, a little Valentine game and some plastic Valentine confetti (all from Oriental Trading purchased for cheap out of season *wink*) and some little SweetTart candies - got those cheap too...more about that in a bit.

Feb03_6

My happy little mess....

Feb03_5

I also purchased these coordinating glittered chipboard letters and put each child's initial on their own treat package to personalize it. I felt like the package needed just a little something else, so I used the brads that match from the Cupid line as well. Because I already had the paper adhered, I cut off the backs of the brads with a wire cutter and stuck a piece of dimensional adhesive on the back instead of having to poke anything through which could be dangerous for little kids anyhow.

Feb03_4

I used different colors of ribbon - all from Papertrey Ink - Melon Berry, Spring Rain, Sweet Blush and Spring Moss (not shown).

Feb03_3

Feb03_2

And last but not least - the story of the candy. It's Halloween candy! Oh no you didn't. Oh yes I did! I totally put Halloween candy in a Valentine package - LOL I bought this $3.99 bag at Target after Halloween on clearance for 90% off. That would be 40-cents my friends. And candies like SweetTarts never go bad, plus, they're nothing but colored sugar - just what the kids like, right?!

Feb03_1

So what about you? Making anything special for the kiddies and their classmates?
I'd love to see it - link me up!

Tuesday, January 26, 2010

Have you tried Zva bling?

Happy day, Girls!

Today I've got 2 cards using bling by Zva Creative. I'd be interested to know if you have tried any of their products and if so, what your thoughts are. I'm really struggling with their bling and I see so many people - the pros - using this stuff and before I write it off forever I want to know if I'm in the minority here.

My first card today (pardon the crooked photo) features patterned papers by My Little Shoebox on some Lemon Tart cardstock. I stitched around the edge and on the folded up piece of the patterned paper. My flowers and bling are both from Zva (the flowers I have no issue with). Here's my problem with their swirly blings like this: flimsy, do not hold their shape and do not adhere well....anyone? My sentiment is from Verve.

Zva3_ThinkingofYou_10_13_09

On this fun card I've got patterned papers and chipboard by Sassafras - who knew monsters would be so popular? Monsters and robots - and more are coming out this year. My shooting star is from Zva and I've notice that things like this and the arrows are nice and firm, so that's good - but again, the adhesive isn't that...sticky, I guess. My blue line bling is from them as well and again - flimsy and not doing so hot with the adhesive.

Zva4_BestTeacher_10_13_09

On cards that I made after these two and used Zva products on, I added a little Tombow Mono Multi to them before adhering. I mean I guess I could do that all the time but that sort of defeats the purpose of self-adhesive, KWIM? So anywho - if you've used these, I wanna know what your thoughts are. I should ad I've had different packs from different sources - so telling me I got a bad pack ain't it *wink* - thanks!

So nice to *see* you today!

Monday, January 25, 2010

Papertrey Ink Blog Hop

Blog-o Regulars:
This is my 2nd post for today - scroll down for this morning's goodness.


Hello - and thanks for stopping by on the first Papertrey Ink Blog Hop of the new year. This month's challenge was to create the total package: finish off the inside of the card, maybe do something to the envelope, etc. A great challenge for me because I don't do any of those things - I do the card front and that's it. So this was really fun for me. Alright - so let's talk card.

Because this challenge was already a challenge for me from the get-go, I decided to challenge myself and use some kraft cardstock paired with Papertrey's Simple Valentine patterned paper. I don't use a lot of kraft and this isn't a combination that I would normally do, so what the heck - let's give it a shot.

PTIBlogHop14_01_10_

I adhered the darkest piece in the pack to my card front and then punched a heart into it to expose the inside.

PTIBlogHop13_01_10_

And then I stamped a heart through the punched heart area in Hibiscus Burst.

PTIBlogHop12_01_10_

Then I dumped out a bag of Sweet Blush vintage buttons on my work area because I thought surrounding the cut-out heart with buttons might be a cute idea.

PTIBlogHop11_01_10_

PTIBlogHop10_01_10_

I put the buttons aside because I thought they should be the last piece of the card front so that they can sit and dry, and then finished the front of my card. A strip of patterned paper....

PTIBlogHop9_01_10_

PTIBlogHop8_01_10_

....some stitching in the corner, and a Fresh Snow bow. With the exception of my buttons needing to be glued, I was done with my card front for now.

PTIBlogHop7_01_10_

I decided to add a piece of a Jenni Bowlin bingo card and sentiment to the inside of my card next to the heart.

PTIBlogHop6_01_10_

And then I matchy-matchied the envelope to the card front with the same patterned paper and a Sweet Blush button.

PTIBlogHop5_01_10_

And here are my finished pieces.

PTIBlogHop4_01_10_

PTIBlogHop3_01_10_

PTIBlogHop2_01_10_

PTIBlogHop1_01_10_

See you on the Hop!

Valentines with Verve & MME.

Happy Monday, Girls!
I hope you all had a super weekend and are happily entering a new week.

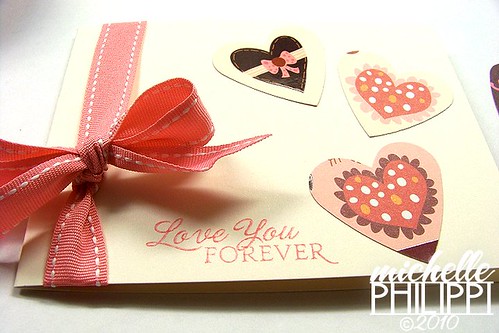
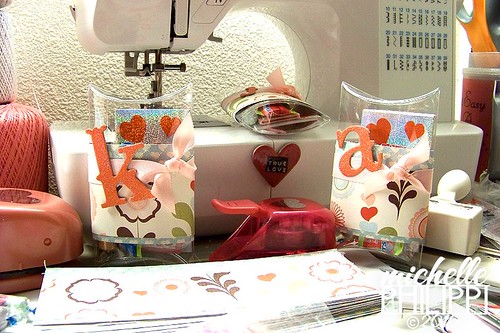
Today I've got a fun little card that I made in the 1/2 hour I had between dinner and American Idol last Wednesday night. It would have been less than that, but I had to take pictures to share with you all. Who doesn't love eye candy? Well, if you hate it, just smile and nod, would ya'? *wink*

This was the day that my new 
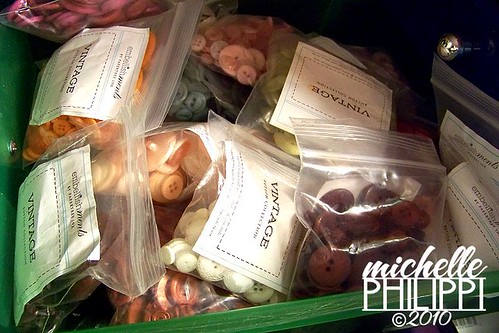
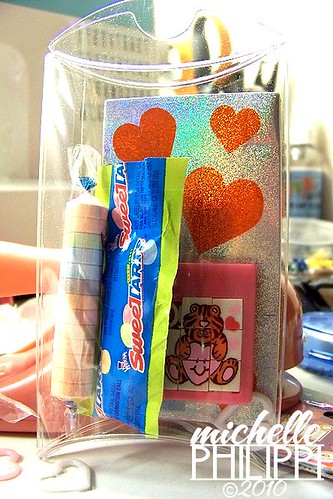
Verve stamps got here. So I knew from the outset that I was making a card with one of these new stamps. But I have to show you the fancy-schmancy packaging Miss Julee does with your Verve stamps. Stamps come wrapped in this pretty light turquoise tissue paper with sparklies, and the invoice is pretty too - nice heavy linen paper with all the pretty coordinating Verveness on it.

VerveValentine16_01_20_10

VerveValentine15_01_20_10

And did you know that you always get a free stamp with your order? What a generous bonus. It's the first thing I look for in my package - the stamp that says "thanks for your order!" And it's always a cute simple sentiment - and who can't use more of those?

VerveValentine14_01_20_10

VerveValentine13_01_20_10

So I chose the stamp I wanted to work with and put the rest of the package aside. Because I don't color images, I buy most of the Plain Janes which are these great little sentiment stamps for $3 each.

VerveValentine12_01_20_10

I gave Love Me Do so much love the week before last, I totally forgot about Be Loved. So today's card again features patterned papers by My Mind's Eye.

VerveValentine11_01_20_10

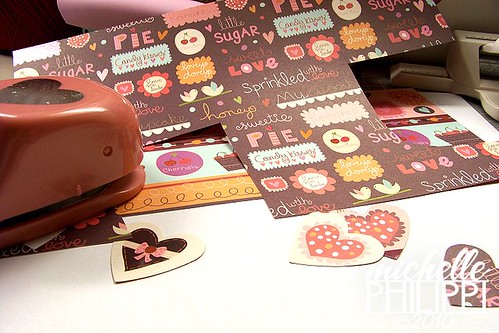
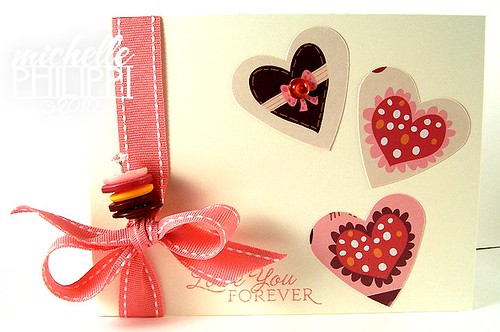
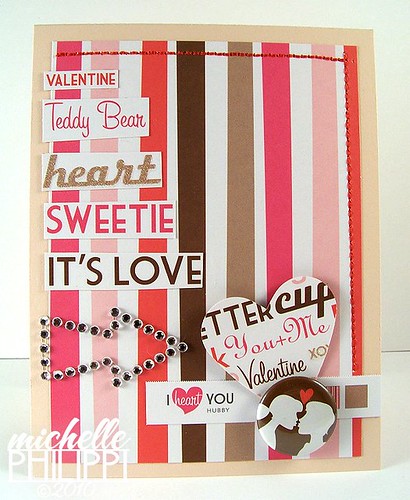
Because I was on limited time, I didn't want to be cutting and thinking too hard, so I decided to use a piece from the packaging as my main patterned paper piece.

VerveValentine10_01_20_10

VerveValentine9_01_20_10

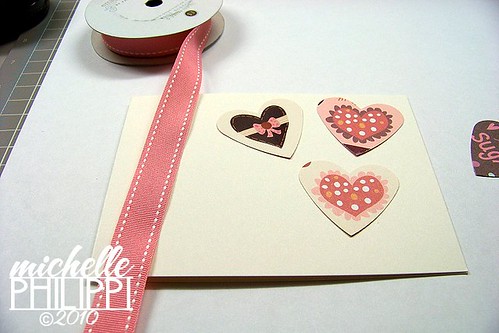
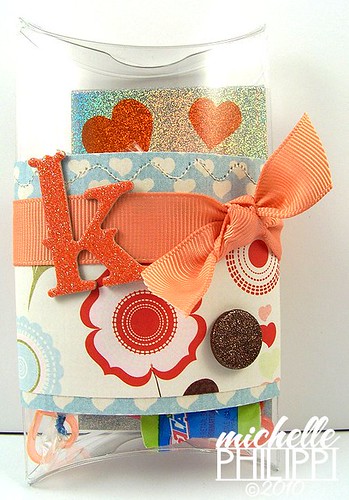
I thought it might be cute to have the sentiment sort of sticking up behind the patterned paper, so I pulled out this great little pack of Anna Griffin Valentine journaling cards that I picked up at Archiver's. I don't scrapbook, but I think these journaling cards are great for creating sentiment panels.

VerveValentine8_01_20_10

I flipped through to find the one that would match the best - cream, brown and a little bit of pink. And then I set my stamp on top of it to make sure it would fit OK.

VerveValentine7_01_20_10

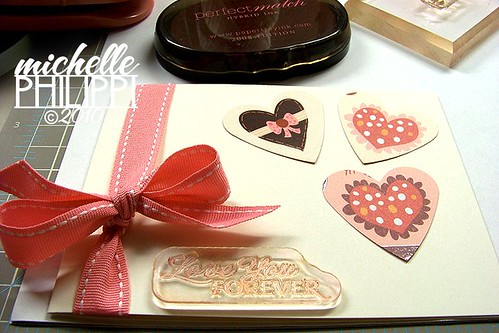
Since this was my first time stamping with this stamp, I did one stamp on some paper, and then stamped on to my journaling card. Some clear stamps that I get I have to stamp and smoosh and do several things to them at the outset to get a clean image. With Verve stamps, I typically just have to do one and I'm good to go.

VerveValentine6_01_20_10

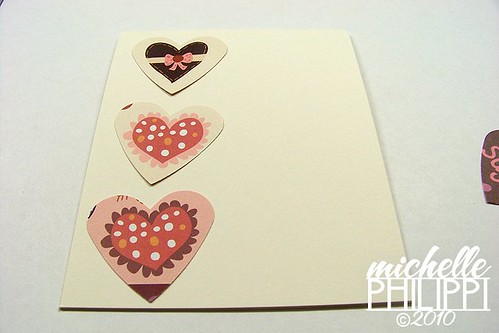
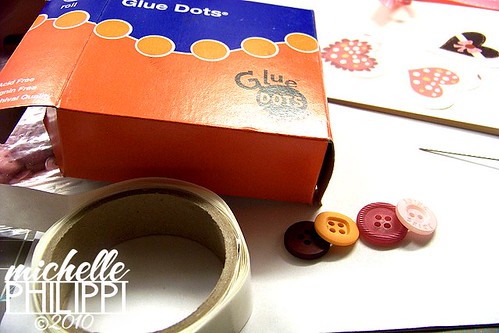
I adhered my sentiment panel first and then popped up the patterned paper piece with some dimensionals.

VerveValentine5_01_20_10

I punched a heart out of some of the coordinating patterned paper and that didn't stand out enough, so I used one of the diecuts from the paper pack and popped it up with a dimensional over the heart.

VerveValentine4_01_20_10

VerveValentine3_01_20_10

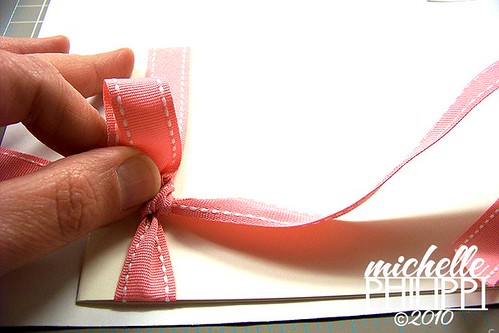
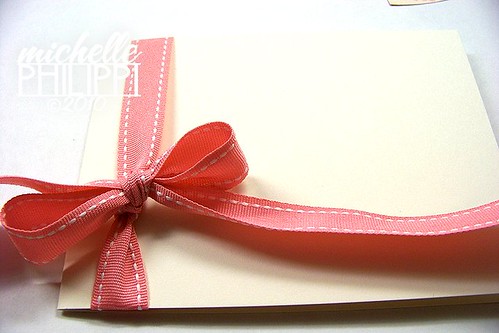
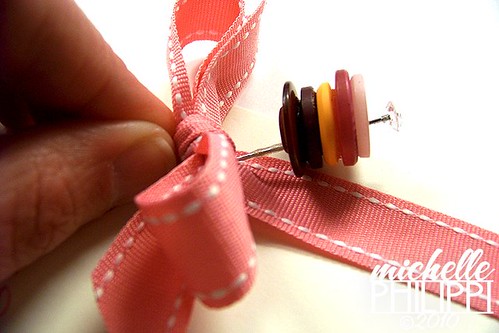
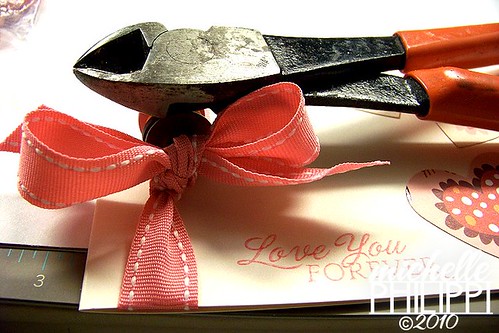
I wrapped some red crochet thread around the top of my card, stood it up on my dusty Big Shot *giggles* and just stared at it to think about how to finish it off.

VerveValentine2_01_20_10

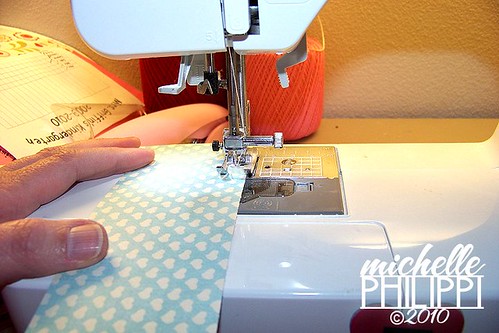
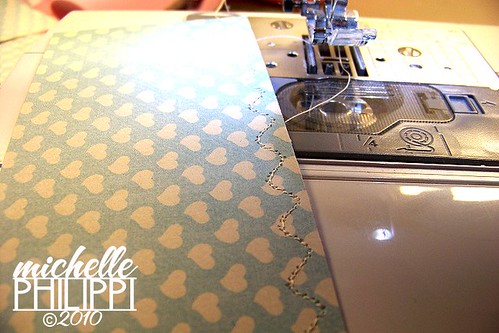
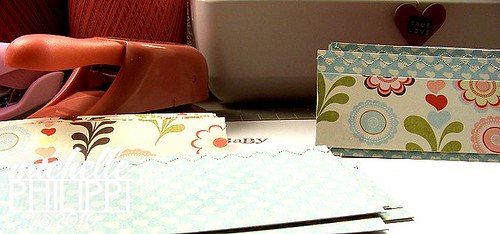
I punched a heart border on to a strip of coordinating patterned paper, added some lace trim from A Million Memories, a little 
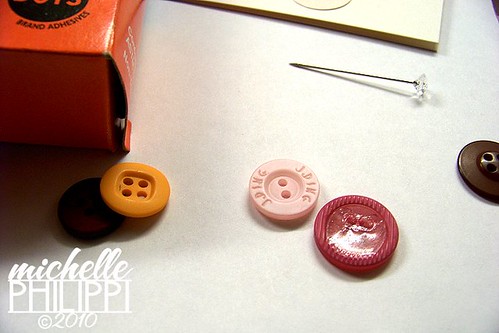
Fancy Pants heart pin, and topped it off with a Dew Drop and I was happy and on the couch in time to hear Ryan Seacrest say "THIS is American Idol."

VerveValentine1_01_20_10

Be sure and hop back by at 3pm my time today for my Papertrey Ink Blog Hop project - it's fabby...and with more pictures *wink*

See you soon!